If you decide the iOS 9.3 public beta just isn't for you, you can downgrade back to iOS 9.2.
The iOS 9.3 public beta is a way to try out the next iteration of iPhone and iPad software. But it may not be for you, at least not right now. If you downloaded the iOS 9.3 public beta but now you want to go back to the current version, iOS 9.2, that fine. You can always try iOS 9.3 again later, or wait for the final release this spring. What's more, downgrading is easy, all you need is iTunes on your Mac or Windows PC, and to follow the steps below!
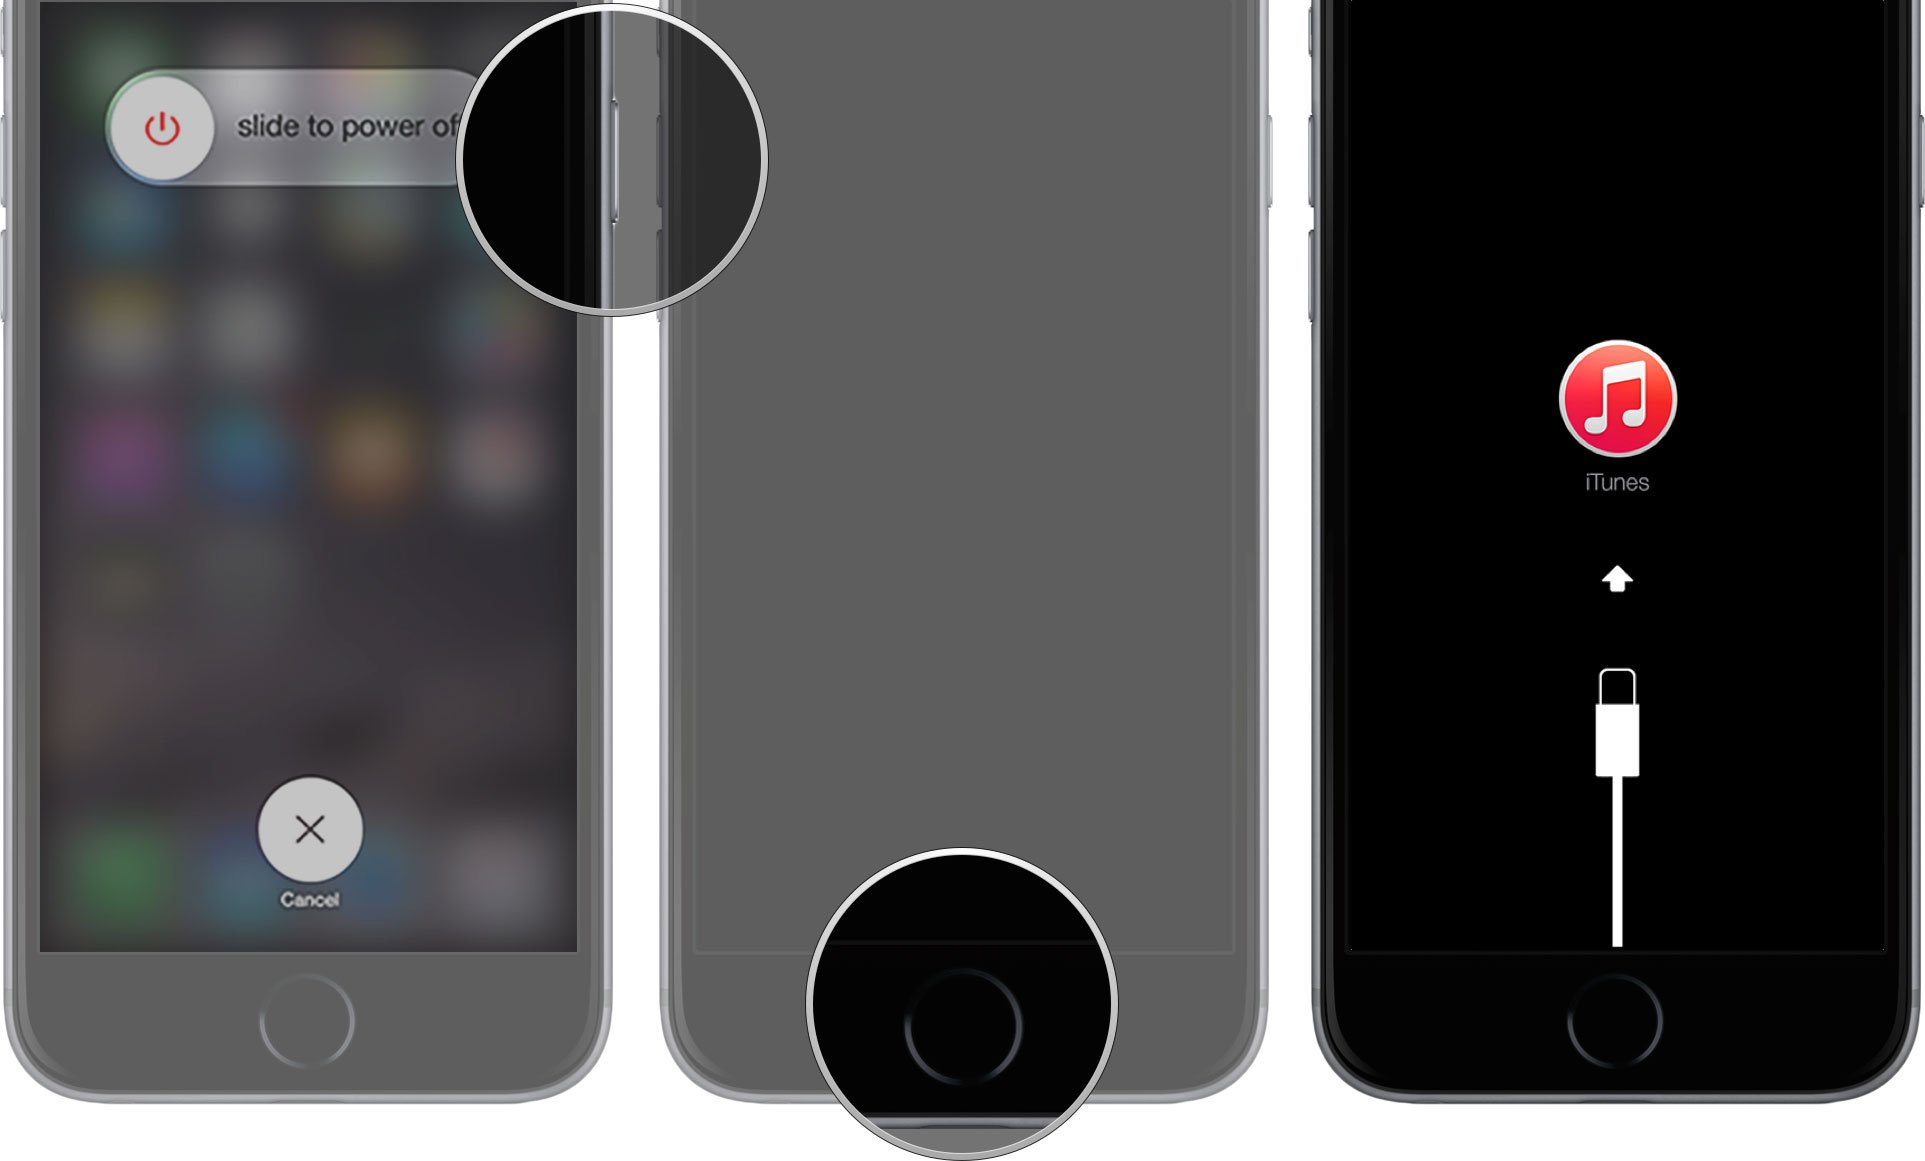
How to put your iPhone and iPad into recovery mode
There's no button tap to revert your device back to iOS 9.3. So, to get started, you'll need to put your iPhone, iPad, or iPod touch into recovery mode. That lets iTunes take over.- Turn off your iPhone or iPad. (Hold down the Sleep/Wake button until Slide to power off appears, the slide.)
- Plug your USB to Lightning cable (or USB to 30-pin Dock cable for older devices) into your computer.
- Hold down—and keep holding down—the Home button on your iPhone or iPad.
- Plug your USB to Lightning cable (or USB to 30-pin Dock cable for older devices) into your iPhone or iPad.
- Continue holding down the Home button until the connect to iTunes screen comes up.

If, for some reason, Recovery Mode doesn't work, you can also try putting your iPhone or iPad into DFU mode. Device Firmware Update mode is a little trickier to get into, but will often force a restore even when nothing else works.
How to downgrade to iOS 9.2 on your iPhone or iPad
If iTunes on your Mac or Windows PC doesn't launch automatically, launch it manually. iTunes will detect your device in recovery mode and ask you what you want to do.- Click Restore on the iTunes popup.
- Click Restore and Update to confirm.

- Click Next on the iOS 9.2 Software Updater.
- Click Agree to accept the Terms and Conditions and start downloading iOS 9.2.

If your device reboots to iOS 9.3 before the download is complete, simply repeat the steps above and put it back into Recovery Mode. Once the download is complete, iTunes will restore your iPhone, iPad, or iPod touch to iOS 9.2.
How to restore your archived iOS 9.3 backup to your iPhone or iPad
Once your device is restore, it'll have a clean copy of iOS 9.2. To get your data back, you'll need to restore from a previous backup. If you've been running iOS 9.3 for more than a day, your standard iCloud or iTunes backup will likely be iOS 9.3-based and may not restore properly to an iOS 9.2 device (we're testing this now). That's where the archived backup you made prior to installing the iOS 9.3 public beta comes in...
- Select Restore from this backup in iTunes.
- Choose the archived backup you made before installing the iOS 9.3 public beta.
Source: iMore
You may have interest:
No comments:
Post a Comment