

If you would like to capture and record the screen of an iPhone, iPad, or iPod touch, you can easily do so thanks to QuickTime, the video app that comes with every Mac. This offers a simple solution for recording the screen of an iOS device for demos, presentations, tutorials, and much more, and it’s remarkably simple to use.
To get started capturing a video of an iPhone or iPad screen with QuickTime, you’ll need a USB cable, and want to be running a modern version of OS X on the Mac, and a modern version of iOS on the iPhone or iPad. Specific requirements and an alternative approach for older versions are discussed further below. But since most users already have all that is necessary on their Mac and iPhones right now, let’s jump right into recording the devices screen.
How to Record an iPhone / iPad Screen on Mac with QuickTime
1. Connect the iPhone (or iPad / iPod touch) to the Mac with a USB cable2. Launch QuickTime Player in OS X, as found in the /Applications/ folder
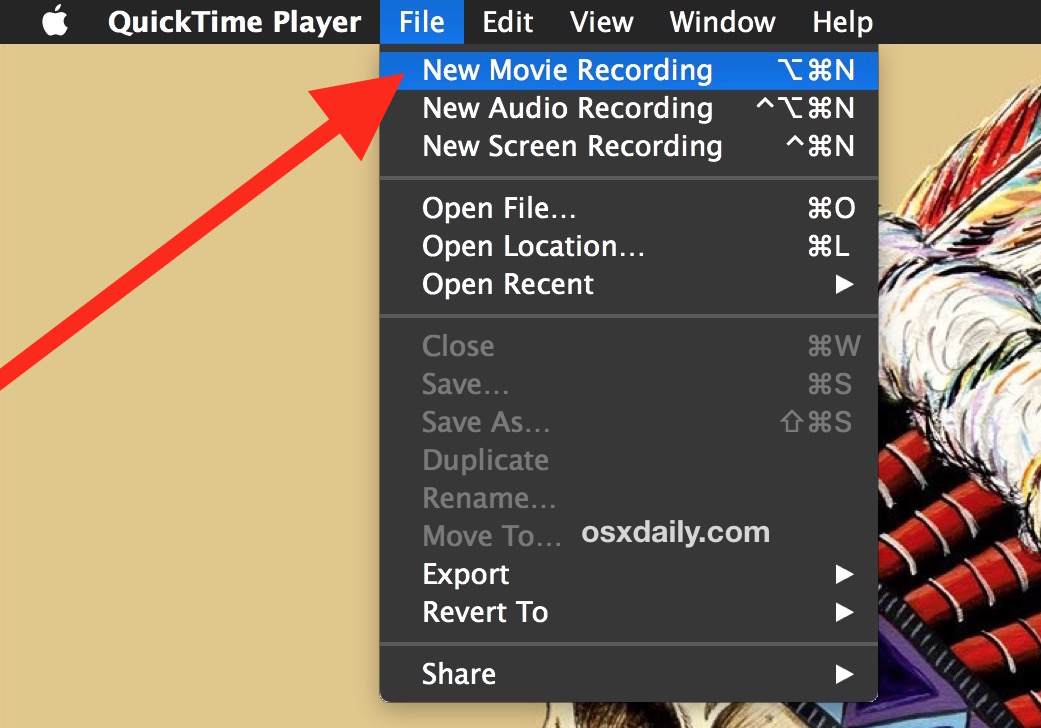
3. Pull down the “File” menu and choose “New Movie Recording”
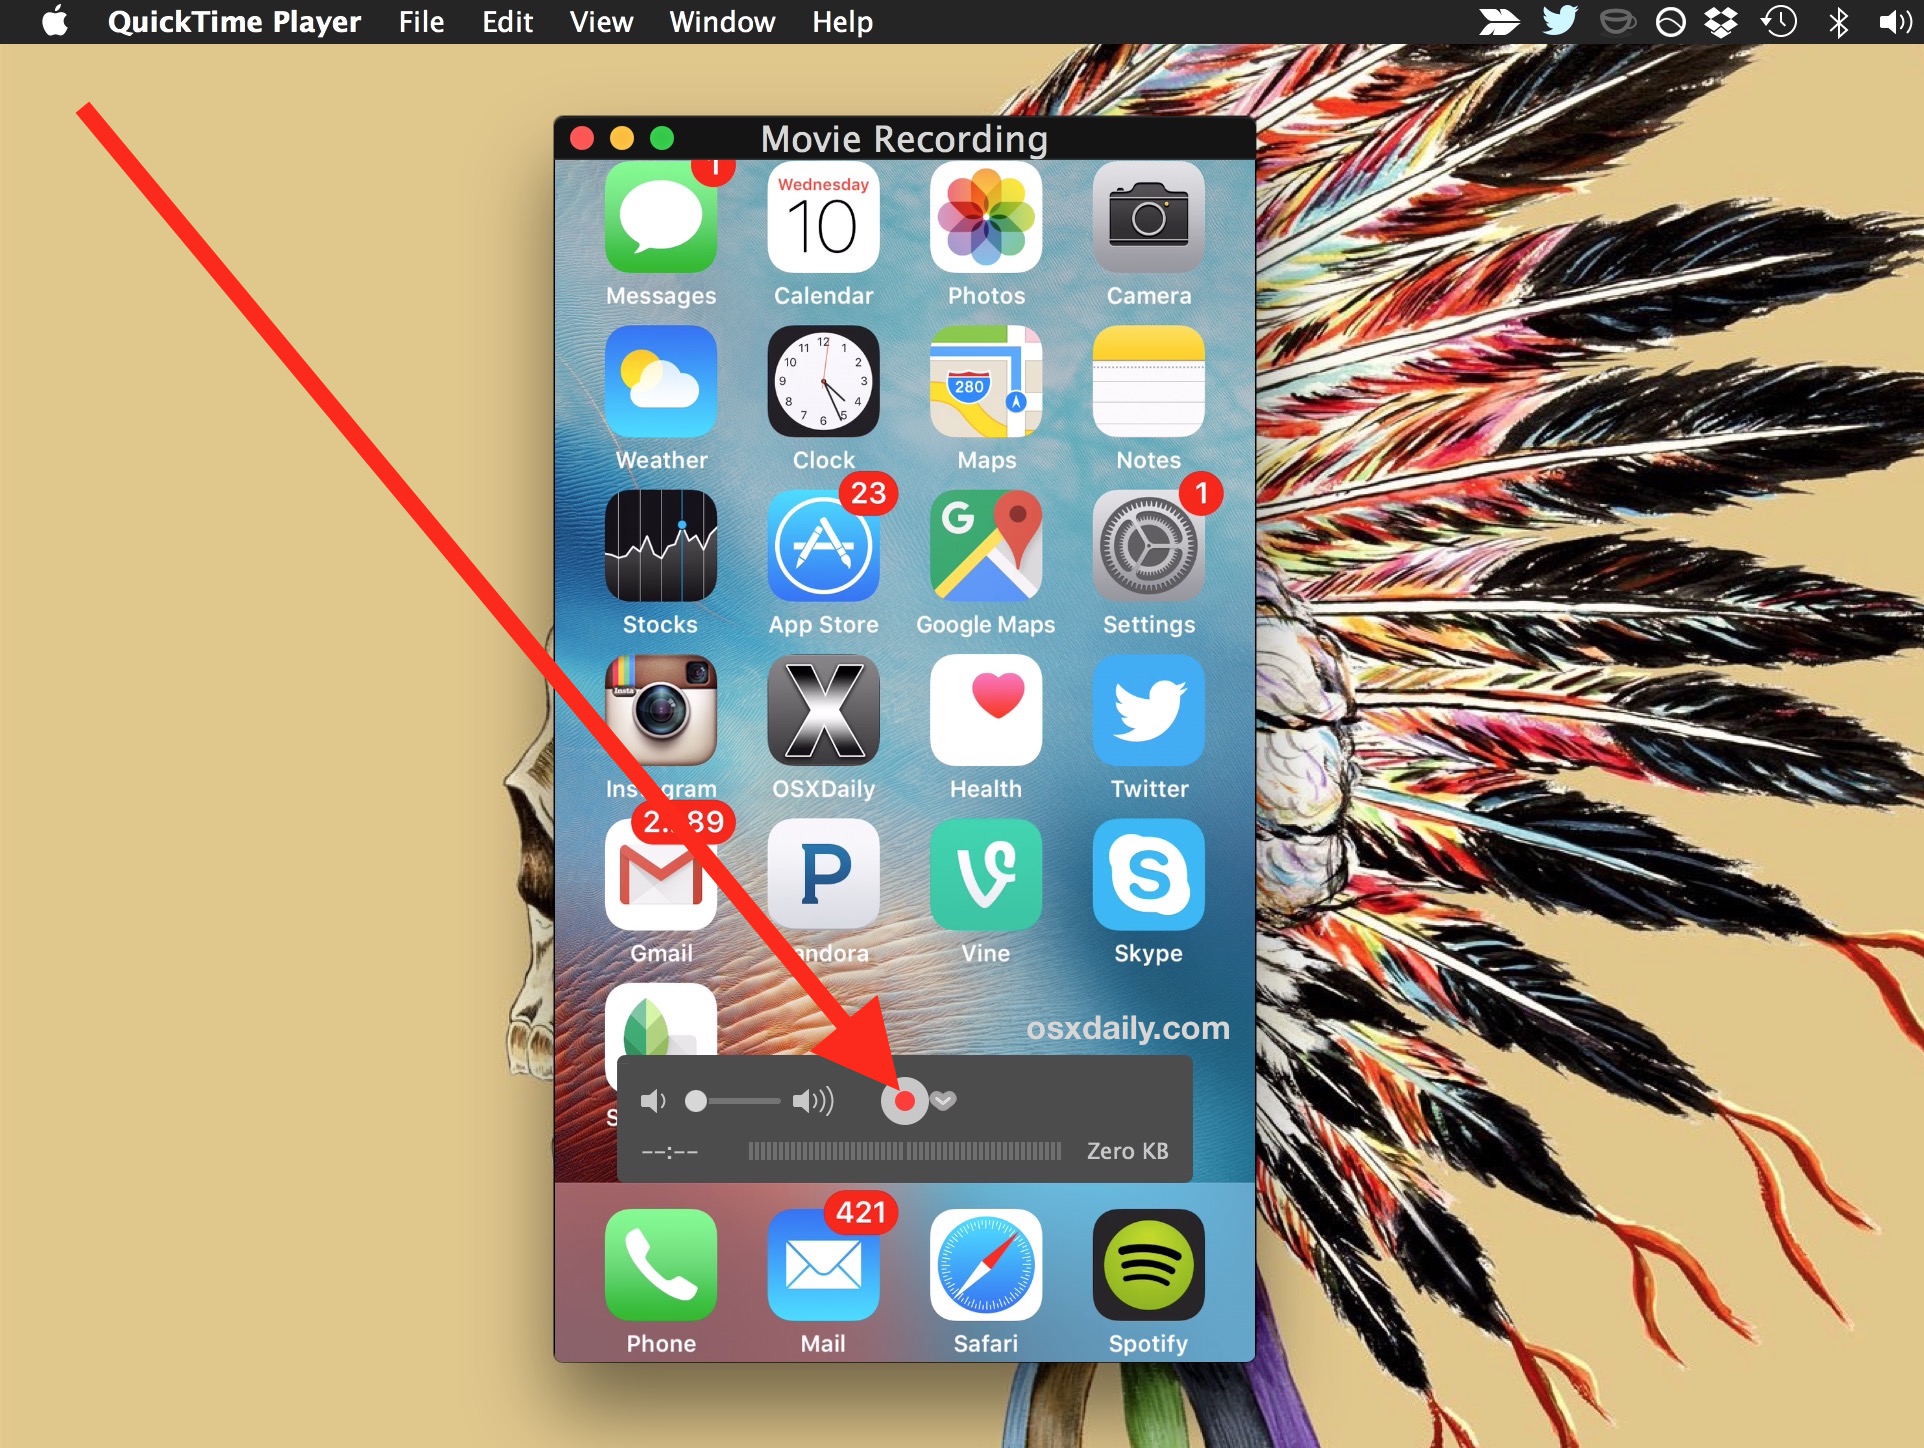
4. At the video recording screen, hover the mouse over the active window so the record and volume controls are visible, then click on the little arrow next to the red record button to show the camera and microphone recording options – from this list choose the name of the connected iPhone for ‘Camera’ and for ‘Microphone’*

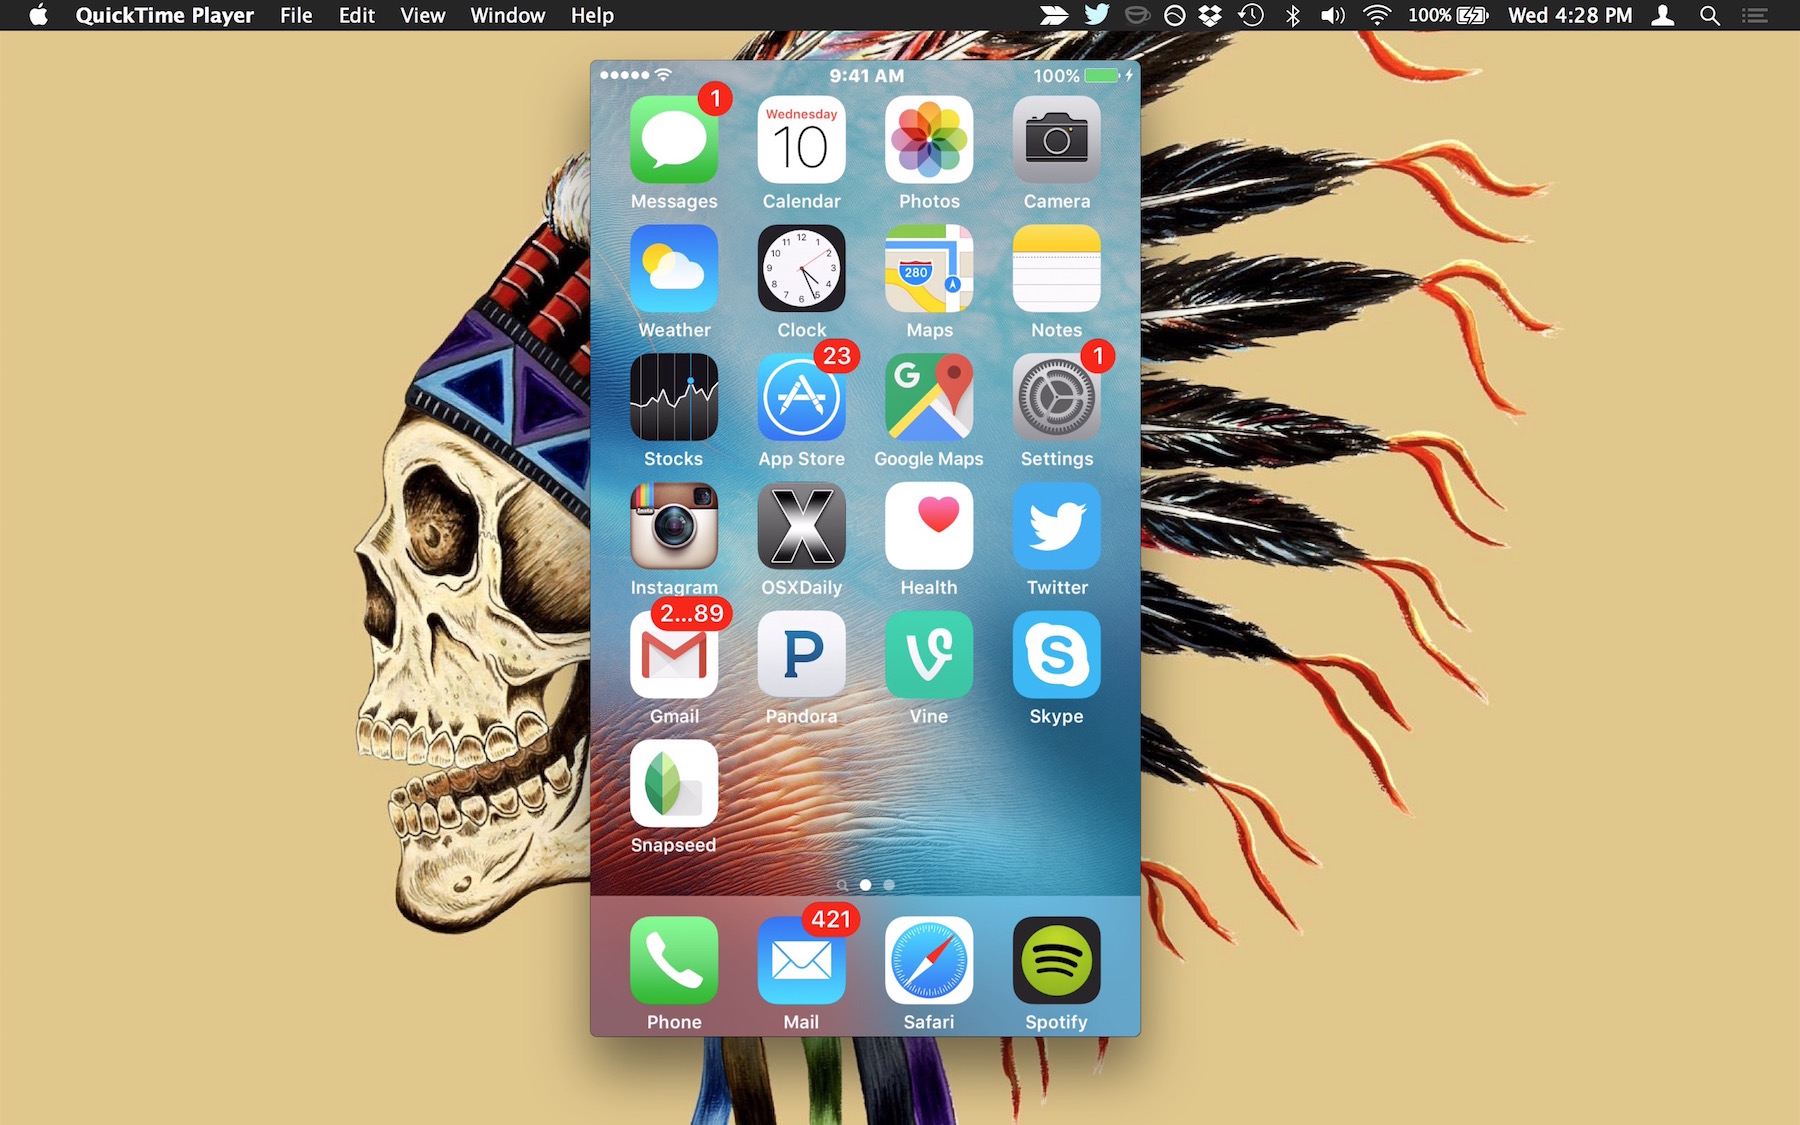
5. You’ll now see the Movie Recording screen turn into the iPhone, iPad, or iPod touch screen, unlock the iOS device as usual and the Home Screen will display on the Mac screen ready to record, when you want to start recording the video click on the red Record button
6. To stop recording the iOS device screen, you can press the Stop button in the upper right menu bar of the Mac, or hover over the video and choose the Stop button (what the record button turns into)
7. If desired, trim down the video in QuickTime, otherwise save the screen recording by going to the File menu and choosing “Save”

That’s all there is to it, the saved iPhone screen recording will be a .mov video file. Opening the .mov file will default to launch in QuickTime, but you can edit the video in QuickTime, iMovie, Final Cut, convert it to another video format, upload it to share online, embed in a presentation, or whatever else you want to do with the screen capture.
* If you want to record the audio directly from the iPhone, choose the iPhone as the ‘Microphone’ source input as well, otherwise the video capture will come from the iPhone screen but the microphone will record from the Macs built-in mic.
The screen video captured on modern devices is high resolution, on new iPhones that is 1080 × 1920 resolution in vertical mode, and 1920×1080 in horizontal.
For longtime Mac users, you may recall that it’s also possible to record the Mac screen with QuickTime too, a handy feature that has been available in OS X for quite some time. The introduction of the ability to record connected iOS device screens is much newer, however, and it’s sort of a hidden feature that is often overlooked. There’s even a built-in audio recording feature in QuickTime if you just need to capture some audio, even audio from the iPhone or iPad microphone.
The tutorial demonstrates mirroring and recording an iPhone 6S Plus screen with iOS 9.3 on a Mac with OS X El Capitan 10.11.4, but it will work with any other iOS device or Mac as long as the basic system requirements are met. The iOS device must be running a modern version of system software at version 8 or newer, and the Mac must be running a modern version of OS X at version 10.10 or newer. If you do not meet these system requirements or are running prior versions of system software on the Mac or iOS device.
Source: OSXDaily
Read more:
How to Move Photos from Camera Roll to Album Freely
No comments:
Post a Comment